How to Export Kerio Mailbox to PST Format – Complete Solution

Are you looking safe solution to export Kerio mailbox to PST file format? Then, there is no need to go anywhere. You have come to the right platform. Now, you are asking why? Because this blog will give you a complete and secure way to export the entire mailbox data.
On the other hand, wouldn’t it be great if every single person who does not have Outlook installed in the system can be able to export emails to PST file type?
Do you know? Exporting data to PST is very easy. But how you can connect Kerio to Outlook without much effort is a matter of concern.
That’s why we are here to guide you!
User Query
“Hey, I am looking for a solution to export Kerio mailbox to PST. I have the bulk of Kerio emails in my local storage. I tried many solutions but none of the methods give me the accurate and best result. Now, please someone suggest to me the correct solution to solve this problem.”
We will give you a complete step-by-step solution to transfer the entire mailbox
Manual Solution to Export Kerio Mailbox to PST Format
There is no direct way to export Kerio data into PST. But I discovered one manual solution. First, you need to install the Kerio Outlook connector tool. Then, you can accomplish this solution. In addition, this tool is a Microsoft Outlook plugin that allows controlling your Kerio connect events, tasks, email, and contacts in Outlook.
Step 1: Download Kerio Outlook Connector Tool
1. Install the mentioned application on your system.
2. After that, right-click on the profile, and choose “Integration with Windows.”
3. Now, click on the “Download” icon.
Step 2: Configure Kerio Account into MS Outlook
1. Press on the “File” menu in Outlook, then select the Menu Option Info >> Add account from the drop-down menu.
2. Choose the “Manual configuration or extra server types” and click on the Next.
3. After that, select the “other” option, then “Kerio Connect (KOC Offline Edition)” in the following Window.
4. If any login details are required, then fill them out. Now, the Kerio mailbox is converted into Outlook.
Step 3: Export Kerio to PST
1. Open Microsoft Outlook in your system.
2. Choose File >> Open & Export >> Import/Export option.
3. Now, select the “Outlook Data File (.pst)” from the Export to a file page.
4. Then, choose the required Kerio data that you want to export into PST format.
5. Finally, browse the destination location where you want to store your data, and choose the “Replace duplicates with items exported” option.
6. Finally, the exportation process has been completed.
Limitations of the Manual solution
- The manual method is very risky and takes too much time and effort.
- In fact, the Kerio Outlook connector is available for 30 days only, then you need to purchase the licensed version.
- Also, the premium version is too much expensive.
- Complete technical knowledge and guidance are a must for using manual solutions.
- Users may lose their precious data and attachments.
Automated Method to Export Kerio Emails to PST
This solution is very unique and perfect for every non-technical user. By using PCDOTS Trusted Kerio Migration Tool, you can export the bulk of emails to PST format with attachments in a single process. This software supports multiple file formats and email platforms. As well as, it is maintaining the proper structure of Kerio data.
This advanced software provides 2 versions. First, the free demo version is completely free of cost to understand the software. Also, you can export the first 10 emails in a single process. Second, the licensed version is very useful and powerful to export Kerio mailbox to PST format with attachments and other email elements at once.
How to Use this Software
1. Start the software on your system and click on the “Open” menu.

2. Click on the Email Servers >> Kerio Files >> Choose Files and Folders.

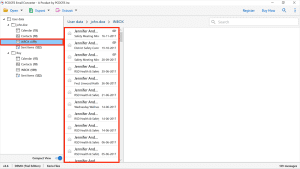
3. After that, the software will show the complete preview, and select the required files.

4. Press on the “Export” option, and choose the “PST” file format.

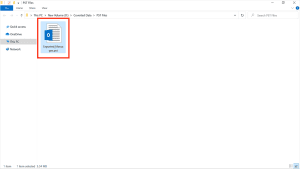
5. Now, enter the destination path, where you will store the exported data.

6. Hit on the “save” icon to export data.

7. Finally, the conversion process has been completed successfully.

Features of the Automated Tool
- This software is easy to use and 100% safe and secure.
- Users can save time & effort using this software to migrate large data in a single process.
- No need to download any other third-party applications along with this advanced software.
- Maintain complete authenticity of data and original structure of the files and folders.
- The demo version is available to export the first 10 Kerio emails into PST.
- There is no limit to the number of file sizes to be exported at once.
- Comfortable working on all Windows versions, including, Windows 11, 10, 8, 7, Windows Vista, and all the above versions.
- You can easily find the required email with the help of the Quick Search Option.
- Moreover, users can export Kerio mailbox into multiple file formats and email clients/services, such as PDF, CSV, Gmail, Thunderbird, Office 365, and many more.
FAQs
1. Is there a trial version of this software?
Yes, you can use a trial version to export a few Kerio data with attachments in a single process.
2. Can I run this tool on a Mac Computer?
No, this application is not compatible to run on Mac, you can run it on any version of windows.
3. How to Export Kerio Emails to PST in a single process?
1. Run the mentioned utility in your system.
2. Upload the data.
3. See the complete preview.
4. Click on “Export” and choose the “PST” format.
5. Provide the destination path.
6. Get the final result.
Conclusion
This blog explained to you two complete methods to export Kerio Mailbox to PST format. You can use any method to accomplish this process. The manual method has many limitations and you can lose your precious data with attachments and other email elements. We are not responsible if you will use the manual method. But if you will use the automated solution, then we can give you a 100% guarantee for your data. Because you can export Kerio emails into PST with attachments by using an automated solution. It gives you the best result with attachments.


