Knee discomfort may seem like a pretty minor issue, but with today’s lifestyle, it is a really acute one. Not only will the pain, swelling, and redness limit your physical movement, but they will also make you feel less confident. Any age group can have knee pain, and one of the most common reasons for knee discomfort is a torn or ruptured ligament. However, the knee itself isn’t the actual problem; rather, the hamstring, quadriceps, and calve muscles as well as the joints and surrounding muscles are to blame. Sometimes the discomfort is also brought on by gout and arthritis, both of which can be extremely painful.
Instead of a strong movement that can make their knee pain worse, people with knee pain need to move slowly and deliberately. With the use of yoga, one can strengthen their knees and the muscles that surround them, relieving knee discomfort. Yoga’s slow, gentle movements stretch and strengthen the muscles around the knee, improving the flexibility of the joint to help you feel better and prevent further knee injuries.
Yoga positions for sore knees
Anyone who experiences knee pain should practice these yoga poses carefully and with great awareness because they can help you stabilize your knee by actively contracting the muscles around it. Therefore, performing these yoga postures under the guidance of a yoga professional as part of an online yoga course would provide many beneficial effects.
Here are some wonderful yoga poses to help you with knee pain.
Bridge pose
In order to perform this yoga pose, you should lie down on your yoga mat, bend your knees, and bring your heels up toward your hips. Keep your arms out to each side extended. As you exhale, place both of your feet firmly on the mat and elevate your hips. If you raise while using your glutes, you can interlock your fingers below your back for a satisfying lift. Hold the position for 20 to 30 seconds before gradually releasing.
Benefits: The bridge posture strengthens your back, glutes, and hamstrings while also aligning your knee correctly.
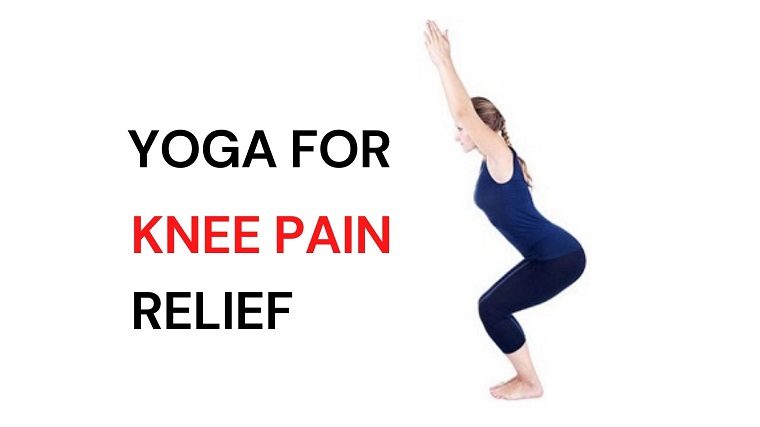
Chair Pose
With your feet hip-width apart and your chest raised, adopt the Tadasana position. Sit back while slowly bending your knees as if you were seated on a chair. Maintain an elevated chest and slowly raise your arms above your head. Your weight should be on your heels, not your toes. Continue to breathe.
One of the best yoga poses for hamstring, quadriceps, and abductor strength, the chair pose also boosts blood flow to the lower part of the body, which aids in the fluidity of movement.
Garland Pose
Spread your feet apart to a mat’s width as you stand in Tadasana. Now squat deeply by bending your knees and bringing your hips down. You can turn your toes out if you want to, but don’t do it too much. Keep your chest raised and your spine straight. Your palm should be in the Namaste position as you bring your arm inside, bend your elbow, and bring it. Breathe deeply as you continue to press your thighs to your arms and your arms to your thighs. After holding the position for at least 5–6 breaths, softly fold forward or gently straighten your legs.
Malasana, also known as the garland pose, strengthens your thighs, knees, and ankles while building strong, lean legs. Additionally, the yogic squat or garland pose aids in simple excretion, which keeps your body clean and clear of toxins.
Triangle Pose
Depending on how it makes you feel more comfortable, stand taller. Turn your right foot 90 degrees inward and your left foot outward. Your feet should be firmly planted on the ground, and your weight should be evenly distributed between both legs. Exhale after taking a breath in, then bend your body to the left from the hips. Allow your right hand to rise into the air and your left hand to rest on the ankle while keeping your hips straight. Breathe deeply while maintaining a wide open chest and pelvis. After exhaling, straighten your feet, bring your arms back behind you, and repeat on the opposite side.
Benefit
Your quadriceps and thigh muscles, which strengthen your knees, are strengthened by the triangle position. Additionally, it aids with weight loss and lessens knee pressure that might be brought on by being overweight.
Butterfly Pose
Stretch your legs out in front of you while you sit on your yoga mat. Bring your feet’s soles together, bend your knees, and maintain a straight spine. Inhale and flutter your thighs like a butterfly. Keep your sitting bones firmly planted, and you will experience relief in your hips, thighs, and lower back with each flap.
It extends your inner thighs and relieves tension in your quadriceps, glutes, and hip muscles. Additionally, it enhances how well the bladder, kidneys, and stomach organs operate.
Warrior II
Standing tall, spread your legs at least three to four feet apart. Now make a 90-degree angle by turning your right and left toes outward and inward, respectively. Right now, flex your right knee till it is precisely above your ankle. As you exhale, extend your arms. Continue holding the position for at least 7 to 8 breaths before switching to the other leg.
For those with knee pain, Warrior II is the greatest and safest yoga pose because it stretches and strengthens the knee while stabilizing it.
Supine Pigeon Pose
Your knees should be bent when you lay on your back. Cross your right ankle over your left thigh while bringing your right knee closer to your heart. Now elevate your left foot off the mat and entwine both of your arms behind your left thigh. On the mat, maintain a straight back, shoulders, and head, and breath. At least 8 to 10 breaths should be held in the position before switching to the other leg.
Your hips, glutes, and quadriceps muscles are stretched out in the supine pigeon stance.
“Hero posture”
Begin in a tabletop position, then lower yourself to the floor and kneel with your knees directly under your hips. By bringing your knees together and pulling your relaxed muscles in that direction, you can increase the distance between your feet. Now straighten your back and squeeze your hips between your ankles. For 5 to 6 breaths, maintain the position.
Hero position is one of the best yoga poses for pain relief, but it may be rather challenging; as a result, one should start by sitting on a blanket.
Lotus Poses
Lay on your stomach with your arms out in front of you. Inhale while supporting your body with your arms underneath. Lift your head, legs, and hips as you inhale, holding the position without twisting your hips. Bring your legs down gently as you breathe.
It strengthens your shoulders and arms while stretching your hamstrings, calf muscles, and overall leg muscles.
Crocodile Pose
Your fingers should be facing upward while you lie on your stomach with your elbows folded. Hold your elbows shoulder distance apart. Raise your head and shoulder while extending your legs with your toes pointed outward. Maintain a straight neck, direct your eyes forward, and rest your chin in your palm. Remain in the pose, take slow breaths, and let your muscles relax. Feel your body relaxing as you breathe.
The crocodile position stretches the muscles in both legs, relieving knee pain.
Read my blogs on key posting


